
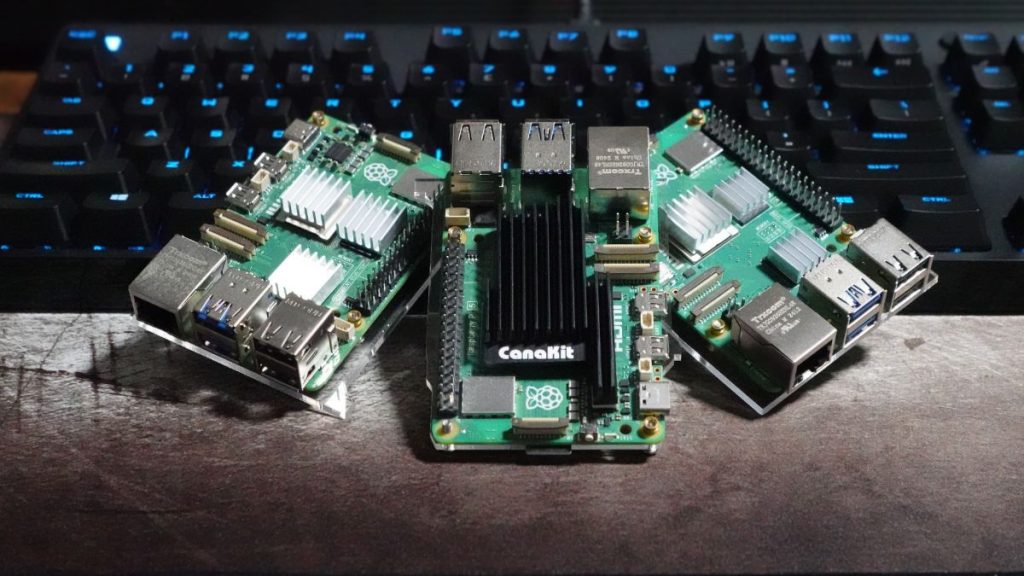
Let’s build a self hosted Raspberry Pi 5 web server, from scratch. I’ll have pictures to help guide all along the way.
If you’re anything like me, you’ve probably got a couple of Raspberry Pi 5 boards collecting dust—maybe even a few Arduino boards tossed in for good measure. I’m a tech enthusiast who tends to overbuy, diving into projects like setting up emulators or experimenting with Raspbian OS, only to move on to the next web-based idea before finishing the last. Sound familiar?
But now, in the side hustle era of 2025, I’m actively looking for smart ways to generate income with the gear I already own. And if I can turn one of those ideas into a scalable tech side hustle? Even better.
That’s what got me thinking: what are some Raspberry Pi 5 project ideas that could actually earn money? Sure, I could build a web scraper or run a local Plex server—but why not go a step further and create a Raspberry Pi 5 web server?
It’s a fun, hands-on project with real-world benefits. Whether it becomes a self-hosted blog, a portfolio site, or the foundation for something bigger, this small board has serious potential. In this post, I’ll walk you through how I’m building mine, the tools I’m using, and the security steps I’m taking to keep my tech side hustle safe—and possibly profitable.
Is Building a Raspberry Pi 5 Web Server Worth It?
Can a Raspberry Pi Handle Real Web Traffic?
Absolutely! Whether you’re hosting a blog, a portfolio, or even a small web app, a Raspberry Pi 5 web server is surprisingly capable. With its upgraded specs, it can handle a respectable amount of traffic—especially for lightweight sites.
That said, the bottleneck often isn’t the Pi itself—it’s your home internet. Most ISPs offer much lower upload speeds than download speeds. For example, serving several images or assets to multiple visitors can start choking on a 50 Mbps upload connection. But here’s the good news: it’s 2025, and both Raspberry Pi hardware and modern web stacks are incredibly efficient. We’ll cover performance tuning later, but for now—yes, it’s viable.
What Does It Actually Cost to Self-Host a Web Server?
If you already own a Raspberry Pi 5, you’re nearly there. The only real costs are minimal: a few dollars per year in electricity, and maybe the cost of a microSD card or optional domain name. That’s it.
Compared to monthly hosting fees or cloud-based services, building your own self-hosted Raspberry Pi web server is a budget-friendly, long-term win—especially if you’re just testing or learning.
Risks and Security Concerns of Hosting From Home
Now here’s where we have to get serious: exposing a device to the public internet comes with real risks. You’ve got two options:
- Local Hosting Only: Your server is only accessible on your home network. Great for learning or internal tools.
- Public Access: Your site is available online—and that’s where things can get risky.
If you take the public route (and this guide will walk you through it), security needs to be your top priority. Port forwarding your home router blindly opens the door to bad actors. Bots constantly scan the internet for open ports and known vulnerabilities. One misstep can put your entire home network at risk.
Sounds scary, right?
Don’t worry. We’re not going to leave your Pi exposed. Instead, we’ll use Cloudflare Tunnel—a secure method that allows your server to be accessed publicly without opening any ports on your router. It masks your home IP, handles DNS, filters malicious traffic, and makes the whole setup safer and smarter.
And we’re not stopping there—later in the guide, we’ll walk through additional server hardening techniques to keep your setup safe from the ground up.
What You’ll Need to Get Started
Essential Hardware and Software
The absolute must haves:
- Raspberry Pi Imager
- Raspberry Pi 5
(This is my Amazon Affillate link that allows me to earn a commission at no cost to you!) - 16gb (or more) A1-rated SD Card
- WiFi or Ethernet
- (optional)An extra monitor/peripherals
- (optional )A domain name
- Patience. We will be troubleshooting something
Choosing a Web Server Stack
There are several software stacks you can run on a Raspberry Pi 5, each with its own strengths. If you’re just getting started, though, you don’t need to overthink it. For this project, we’ll be using the LAMP stack—a proven and lightweight solution perfect for a Raspberry Pi 5 web server.
- Linux – The operating system your Raspberry Pi runs on (we’ll use Raspberry Pi OS).
- Apache – The web server software that serves your pages to visitors.
- MariaDB – The database engine we’ll use to store dynamic content. It’s a lighter, more compatible alternative to MySQL and works better on the Raspberry Pi’s limited resources.
- PHP – The scripting language that connects everything together. It powers your web pages and lets them interact with the database.
Installing Raspberry Pi OS
Raspberry Pi Imager
First need to put our OS onto our SD card. Lets head over to https://www.raspberrypi.com/software/ and download the Raspberry Pi Imager.
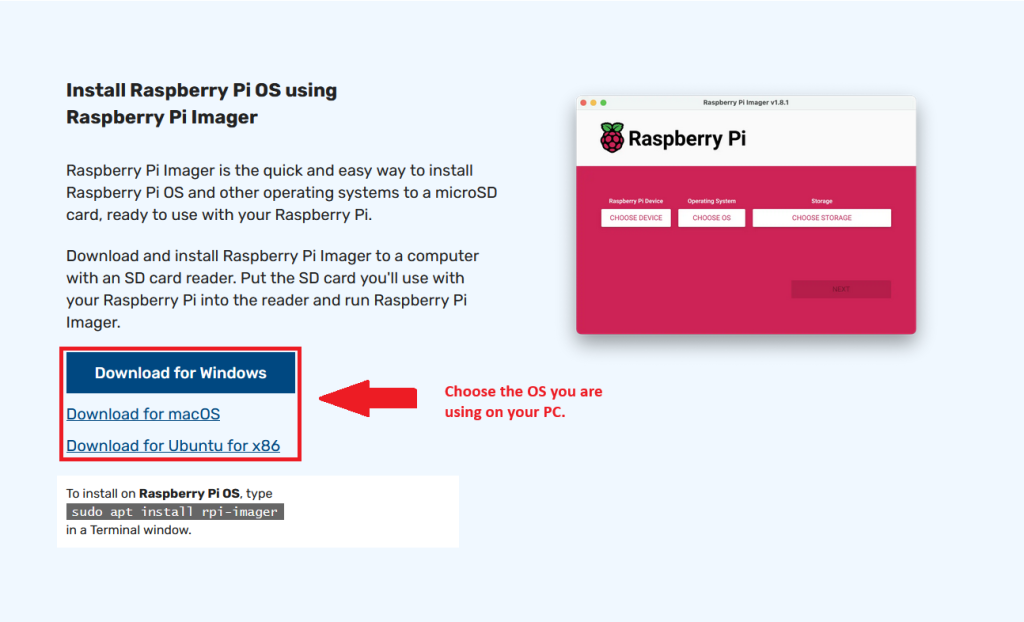
After downloading, opening the .exe, accepting the terms, installing to your preferred drive and running you will be given 3 options.
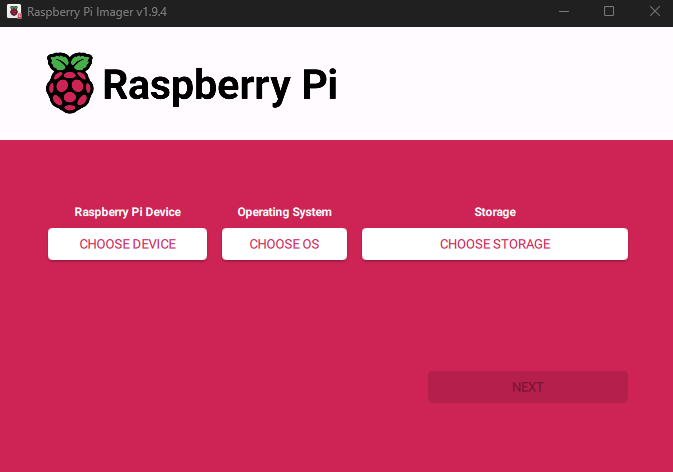
First, we need to choose our device. This tutorial is using the Raspberry Pi 5. So that is the selection we will make.

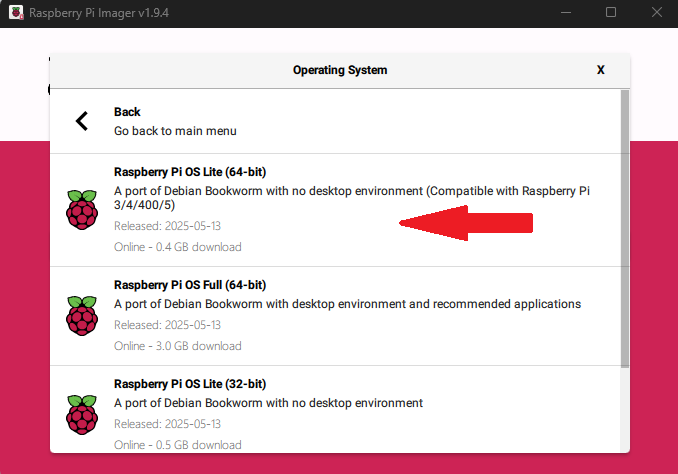
Next, we need to choose our OS. For this tutorial we are using Raspberry Pi OS Lite (64-bit). I am choosing to do headless here for the sake of simplicity. But if you prefer the full version, go for it!
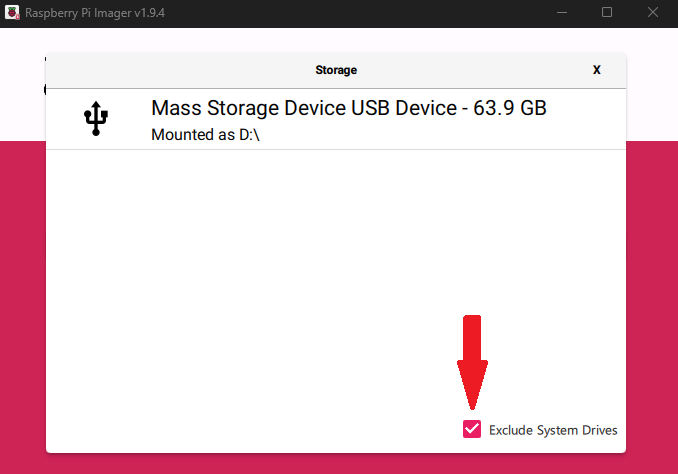
Third, choose your storage device. Ensure “hide system drives” is checked to prevent accidental writing.
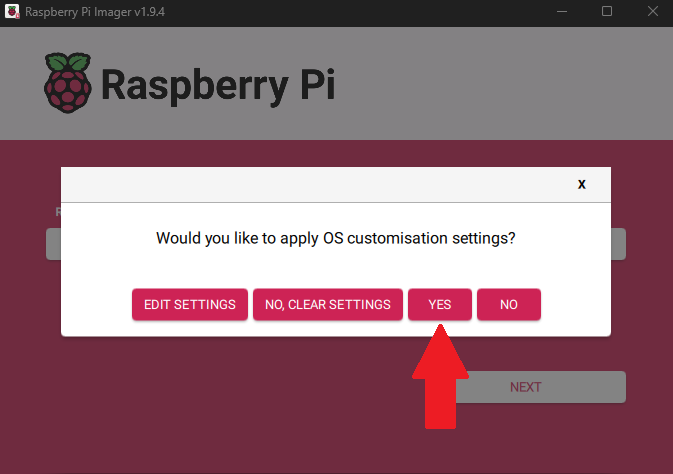
After the three requirements are filled, press “NEXT” at the bottom right. You will get a another set of requirements. These next steps are crucial if you are running a headless (Raspberry Pi OS Lite) server.
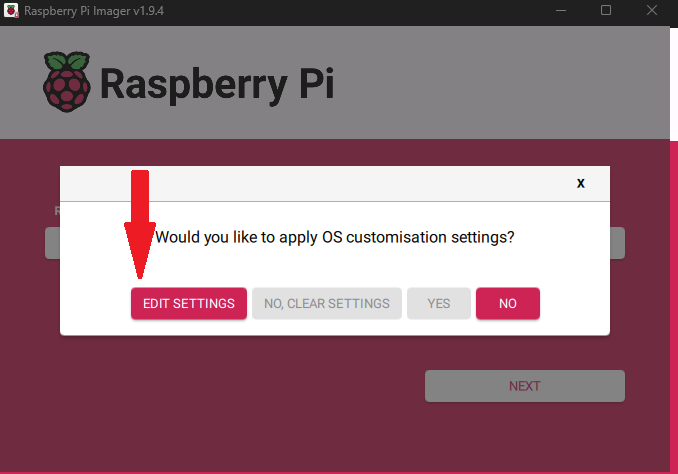
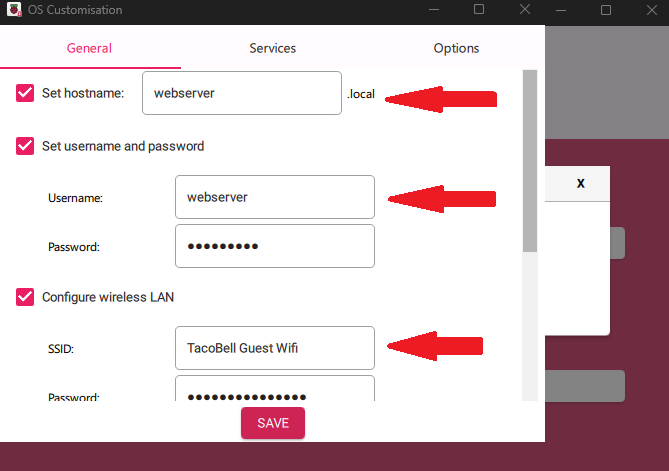
Next, lets choose “Edit Settings”. Here we will enter our preferred host name, set a user:pass and WiFi credentials that we are connecting to. Then save.
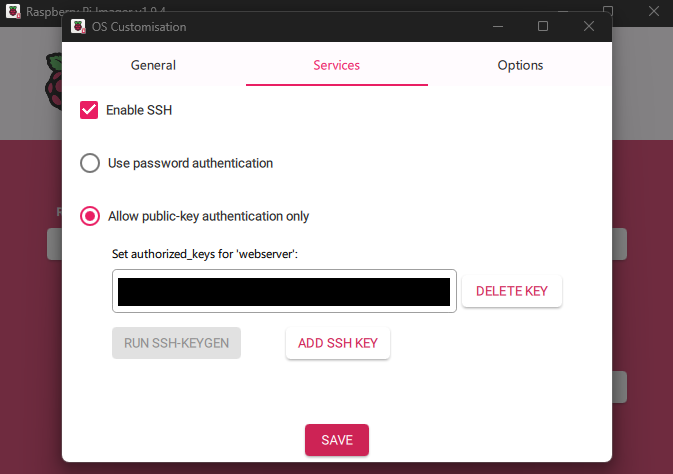
The next tab is “Services”. You will want to enable SSH is you are following this tutorial exactly. You can choose password but I always highly suggest public-key authentication. It is easier and more secure.
To generate a key on windows:
- Go to ‘Search’ or press
win+x. Type and choose ‘Powershell – Run as administrator’ - Run:
ssh-keygen -t rsa -b 4096 - Follow the options. You could press ‘Enter’ through all this.
- Run:
Get-Content $env:USERPROFILE\.ssh\id_rsa.pub
Or open notepad as administrator, navigate toC:\{user}\.ssh\id_rsa.pub - Copy the results to the box in Rapsberry Pi imager
Finally, press “Save” then “Yes” and follow the prompts.
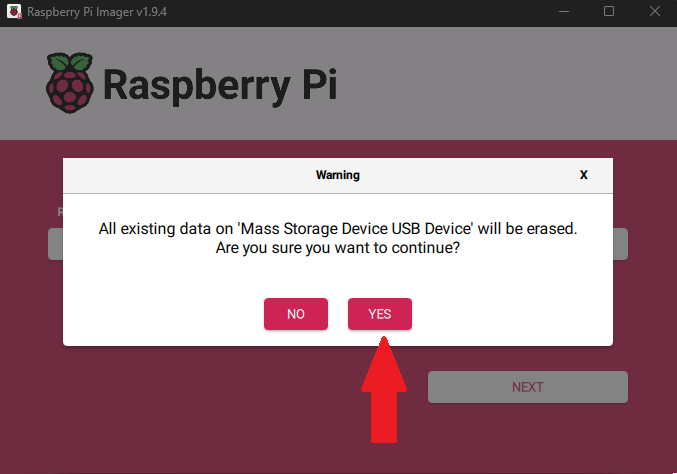
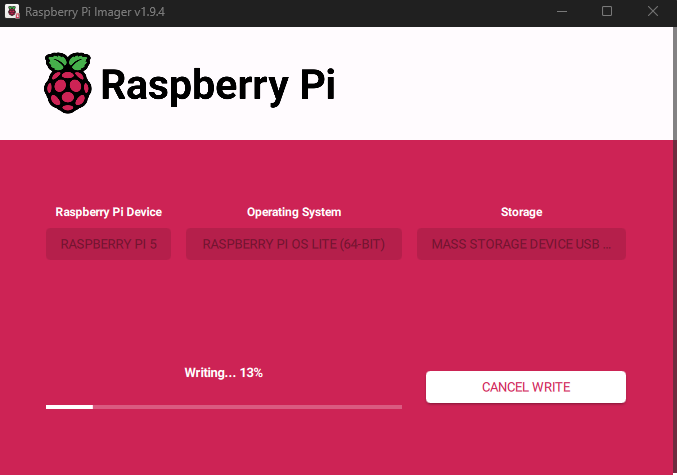
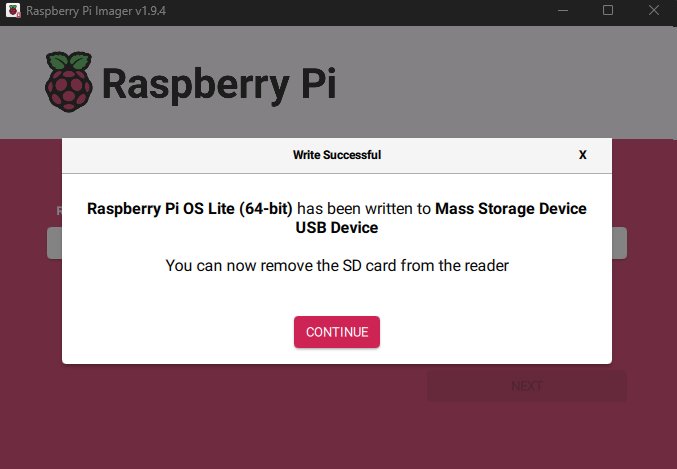
As you can see, it might take a couple minutes to format, write and verify the files. Once completed, remove your newly Raspberry Pi OS Lite sd card from your computer and insert it into your Pi.
Troubleshooting Wifi and SSH:
Before we rock and roll let’s get some tips out of the way to refer to in case things just are not working right at first.
Troubleshoot Raspberry Pi 5 Wifi:
If you are not seeing your Pi on your router list of devices or in netdiscover, nmap etc. our settings in the imager did not take (they never do anymore).
- Plug in a monitor and mouse/keyboard
- Log into your Raspberry Pi 5 directly with the credentials you set.
sudo rfkill unblock allnmcli device set wlan0 managed yessudo systemctl restart NetworkManagernmcli radio wifi onnmcli device wifi list(you should then see access points)nmcli device wifi connect "{Your SSID}" password "{pass}"nmcli connection modify "{Your SSID}" connection.autoconnect yes
Troubleshoot Raspberry Pi 5 SSH:
Try to ssh into your Pi and it say invalid keys? Great, the key we copied and pasted earlier did not take earlier. Lets fix that.
- Check that
~/.sshexists. - If not:
mkdir -p ~/.ssh chmod 700 ~/.sshnano ~/.ssh/authorized_keys- The fun part… Type out your public key (id_rsa.pub or id_ed25519.pub) into this file.
chmod 600 ~/.ssh/authorized_keyssudo systemctl restart ssh- If you get invalid keys still, there is a typo. I never get it right the first time either.
Build A Raspberry Pi Web Server
At this point, you have your sd card imaged with Raspberry Pi OS Lite 64bit and have inserted it into your Pi. I pray to the tech gods that your boot went smooth, Pi is visible on your network and you can SSH in with out trouble.
If not, then I bet the two troubleshooting tips above will fix those issues. And let’s begin!
Step 1. SSH, Update, Web Server & PHP
First, ssh in with ssh {user}@{localIP}
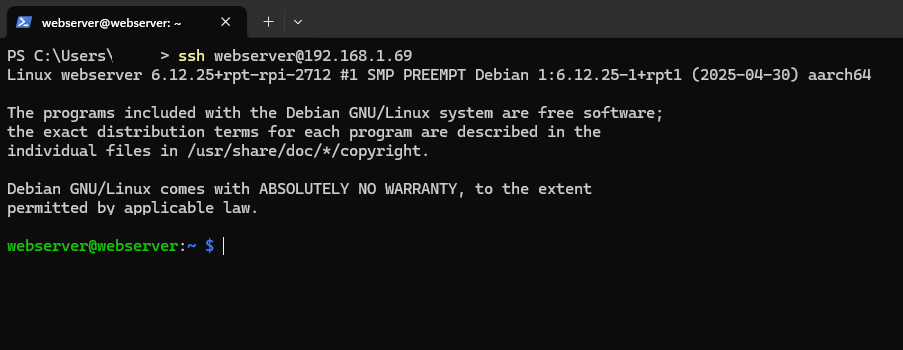
And we are in! Like with any new OS lets update everything before we start carving out a self hosted web server on our Raspberry Pi.
sudo apt update && sudo apt upgrade -y
Let everything run, this may take a minute or two. Afterwards, its server building time.
First Apache, our web server.
sudo apt install apache2 -y
After a successful install you should see the “Apache2 Debian Default Page” when you navigate to http://{Pi IP}

Next, PHP for dynamic web pages
sudo apt install php libapache2-mod-php php-mysql -y
sudo systemctl restart apache2
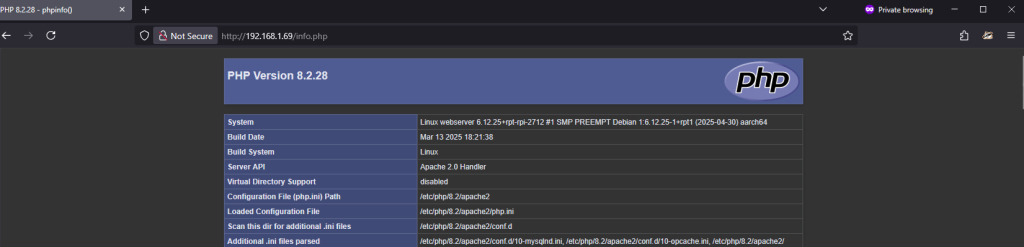
Let’s double check that this was successful and create a php.info page.
echo "<?php phpinfo(); ?>" | sudo tee /var/www/html/info.php
Navigate to http://{Pi IP}/info.php and if everything ran smooth you will see the PHP info page.
Step 2. Build Database for our Self Hosted Web Server
Install MariaDB:
sudo apt install mariadb-server -y
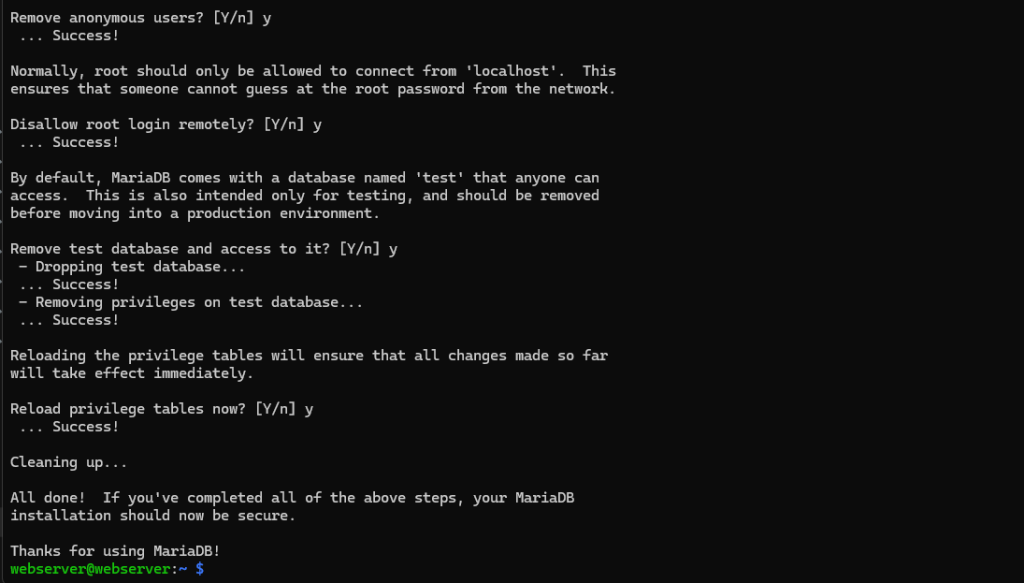
Next, secure our database:
sudo mysql_secure_installation
Follow the prompts. I recommend the following:
- Unix_socket can be enabled if you are the only one managing the database and your database is not managed through a PHP app like WordPress. It also gives sudo based access.
- Set root password: Yes
- Remove anonymous users: Yes
- Disallow remote root login: Yes
- Remove test DB: Yes
- Reload privilege tables: Yes
Just like Apache and PHP, we need to ensure everything is running. Let’s create a test database:
If you enabled unix_socket run sudo mysql.
CREATE DATABASE mytestdb;
CREATE USER '{Your User}'@'localhost' IDENTIFIED BY '{Create User}';
GRANT ALL PRIVILEGES ON mytestdb.* TO '{Your User}'@'localhost';
FLUSH PRIVILEGES;
EXIT;
Next, create the test page to confirm connections:
sudo nano /var/www/html/dbtest.php
Then paste this block in the file:
<?php
$mysqli = new mysqli("localhost", "{Your User}", "{Created User}" "mytestdb");

if ($mysqli->connect_errno) {
    echo "Failed to connect to MariaDB: " . $mysqli->connect_error;
} else {
    echo "Success! Connected to MariaDB.";
}
?>
Afterwards, restart Apache
sudo systemctl restart apache2
If done properly, navigating to http://{Pi IP}/mytestdb.php and get the following message:

You Built A Self Hosted Raspberry Pi 5 Web Server!
But we are not done yet! We need to clean up all our test files and create a basic welcome page to replace the Apache page. Then securities and opening ourselves up to the internet!
Remove the default and created test files:
sudo rm /var/www/html/index.htmlsudo rm /var/www/html/info.phpsudo rm /var/www/html/dbtest.php
Remove our test database:
sudo myqlDROP DATABASE mytestdb;
DROP USER '{Your User}'@'localhost';
FLUSH PRIVILEGES;
EXIT;
Now that we are all clean, lets create a basic static page in the mean time before we start looking into hardening our server.
Lets re create our index.php:
sudo nano /var/www/html/index.php
You can the create your own or just use mine:
<!DOCTYPE html>
<html lang=”en”>
<head>
<meta charset=”UTF-8″>
<title>Self Hosted Raspberry Pi Web Server</title>
<style>
body {
font-family: sans-serif;
text-align: center;
padding: 2rem;
background-color: #f4f4f4;
}
h1 {
color: #2c3e50;
}
p {
color: #555;
}
</style>
</head>
<body>
<h1>Welcome to my Raspberry Pi 5 Web Server!<?h1>
<p>…Hello world…</p>
</body>
</html>
Now visit your page http://{Pi IP}

You’re now officially up and running—your Raspberry Pi 5 web server is live and safely accessible across your trusted LAN. Any device on your local network can view your server’s page, making it a great foundation for future development or testing.
But let’s be honest—you’re probably here to take things further. To get that side hustle started or your portfolio. If you’re ready to turn this into something real, it’s time to harden your server, create a secure Cloudflare Tunnel, and connect your domain to make your Raspberry Pi web server accessible from anywhere on the internet.
Security Hardening Your Raspberry Pi Web Server
Password Security
Ensure you are not running the default password. If you want to change your password to something even more secure, run:
passwd
SSH Safety
Run:
sudo nano /etc/ssh/sshd_config
Double check:
- PasswordAuthentication no
- PermitRootLogin no
If the lines do not exist, add them and restart ssh.
sudo systemctl restart ssh
Disable Directory Listing
sudo nano /etc/apache2/apache2.conf
Find this line:
<Directory /var/www/>
    Options Indexes FollowSymLinks
Change to:
<Directory /var/www/>
    Options -Indexes +FollowSymLinks
Harden PHP
Edit:
sudo nano /etc/php/*/apache2/php.ini
Double check or set these values:
expose_php = Off
display_errors = Off
disable_functions = exec,passthru,shell_exec,system
sudo systemctl restart apache2
Connecting Cloudflare
First things first, create a profile on Cloudflare and get your domain connected there. Then head back to your Pi Web Server.
Update and get cloudflared installed:
sudo apt update
sudo nano /etc/cloudflared/config.yml
wget https://github.com/cloudflare/cloudflared/releases/latest/download/cloudflared-linux-arm64.deb

sudo dpkg -i cloudflared-linux-arm64.deb
Verify installation:
cloudflared --version
You will need to login:
cloudflared tunnel login
This will give you a link to follow. Paste that in your browser, login and choose your domain. When apporved it downloads a cert to ~/.cloudflared/cert.perm.
Create and name your tunnel:
cloudflared tunnel create mypi-tunnel
This will create an id and store it in ~/.cloudflared/.json.
Create the tunnel configuration:
sudo nano /etc/cloudflared/config.yml
Paste this but modify it to your details:
tunnel: mypi-tunnel
credentials-file: /home/{Your user}/.cloudflared/{tunnel id}.json

ingress:
    - hostname: {subdomain.yourdomain.com}
       service: http://localhost:80
    - service: http_status:404
Route DNS through Cloudflare:
cloudflared tunnel route dns mypi-tunnel your-subdomain.yourdomain.com
Manually start the tunnel:
cloudflared tunnel run mypi-tunnel
Enable start up on boot:
sudo cloudflared service install
sudo systemctl enable cloudflared
sudo systemctl start cloudflared
Verify by visiting your domain! Just like that, you have your self hosted Raspberry Pi 5 web server open to the internet, tied to your domain, routed through Cloudflare and secure.
Your Secure, Self Hosted Server Is Built
You’ve just built a self-hosted web server using nothing more than a Raspberry Pi 5, your existing network, and some smart configuration—plus maybe a few well-earned headaches. The result? A fully functional, secure, and scalable Raspberry Pi 5 web server, protected by a Cloudflare Tunnel and tied to your own domain. Whether you use it to host your portfolio, test client projects, or launch a side hustle, you’ve now learned how to make a web server for free—with total control and no monthly hosting fees.
This isn’t just another throwaway Raspberry Pi 5 idea—it’s the start of real, practical Raspberry Pi 5 projects that can grow alongside your skills. From building SaaS tools and internal dashboards to offering paid hosted services—your Raspberry Pi 5 web server could become more than just a tech experiment. It’s the foundation of a real tech side hustle, powered by open-source tools and your curiosity. If you’ve ever wondered how to make a web server and actually put it to work—this is your starting point.
Leave a Reply