
So you want to know how to build your own website—but every tutorial either jumps straight into code or tries to sell you a drag-and-drop tool you don’t really need. Let’s cut through the noise. Learning how to build your own website doesn’t mean you need to be a developer or have a background in tech. You just need to understand the basics: how a domain name works, what a server does, and how content gets from your computer to the internet. Once you’ve got that foundation, everything else clicks into place and building your own website just becomes another thing you can do.
How you build your website/server is just the beginning. The real fun comes from learning to harden your server and create the best user experience.
At its core, a website is just a bunch of files—HTML, CSS, images, and sometimes code—that live on a web server (basically a computer that’s always online). When someone types in your domain name (like bytesizedblog.com), the DNS (domain name system) connects that name to your server’s IP address—kind of like finding someone’s phone number in a contact list, you search the name and a phone number comes up. That server (Get it? The server serves the website) then responds by sending your site’s content to the visitor’s browser, where it gets displayed as a fully working webpage.
Understanding this relationship between domain + server + files is the first step toward building a real website that you control—not a cookie-cutter template owned by someone else. In the sections that follow, we’ll walk through everything you need to get online: from registering a domain and choosing a server, to installing WordPress (or another CMS) and launching your site with HTTPS.
Buy Your Domain To Your Future Website
Before you build your own website, you’ll need to give it a name. Technically, you could launch a server and share its raw IP address with others—but let’s be real: that’s not practical, it won’t get indexed by search engines, and it definitely won’t build trust with visitors. If you want your site to be discoverable, memorable, and worth visiting, you need a proper domain name.
I’ve had great luck using Namecheap.com, which lets you register and verify a domain in just a few minutes—usually for around $7–$10. But you’ll also find plenty of other reputable registrars like GoDaddy, Ionos, or Squarespace Domains.
Start by searching for the perfect domain name and crossing your fingers that it’s not already taken. If your goal is to get traffic and eventually monetize your site, aim for a .com domain. They’re slightly harder to get, but they’re also the most trusted by both search engines and everyday users. Truthfully, this might be the longest step—finding a good name that isn’t already claimed.
Once you’ve chosen your domain and made the purchase, you’ll go through a short verification process. This includes confirming your email and filling in your contact details as the domain’s administrator (aka, the “webmaster”). Don’t worry—nearly all registrars now include free WHOIS privacy protection, which hides your personal info from public records. Instead of showing your real name or email, it displays a proxy email. Just keep in mind: if someone emails that address and you reply, your real email will be revealed in your response.
After verification is complete, your domain is officially live—and now the real fun begins. Next, we’ll build the web server your domain will point to, and get your site online.
Build The Server To Your Website
The following is using DigitalOcean’s convenient quick droplet set up. It is beginner friendly and designed to get you up quickly.
If you’re looking for the fastest and most beginner-friendly way to build your own website, DigitalOcean’s one-click WordPress droplet is a fantastic place to start. It’s designed to get you online quickly, with minimal setup and no unnecessary complexity.
In this tutorial, we’ll be using DigitalOcean, a trusted cloud hosting provider I’ve relied on for years. There are plenty of other options out there—like Linode, Namecheap, Amazon AWS, and others—but I’ve found DigitalOcean to be the most beginner-friendly, with great reliability, strong documentation, and responsive support.
Use my referral link below to get $200 in free hosting credit for 60 days. That’s two full months of cloud hosting to experiment, launch, and learn—without spending a cent upfront.
>$200 Free DigitalOcean Hosting<
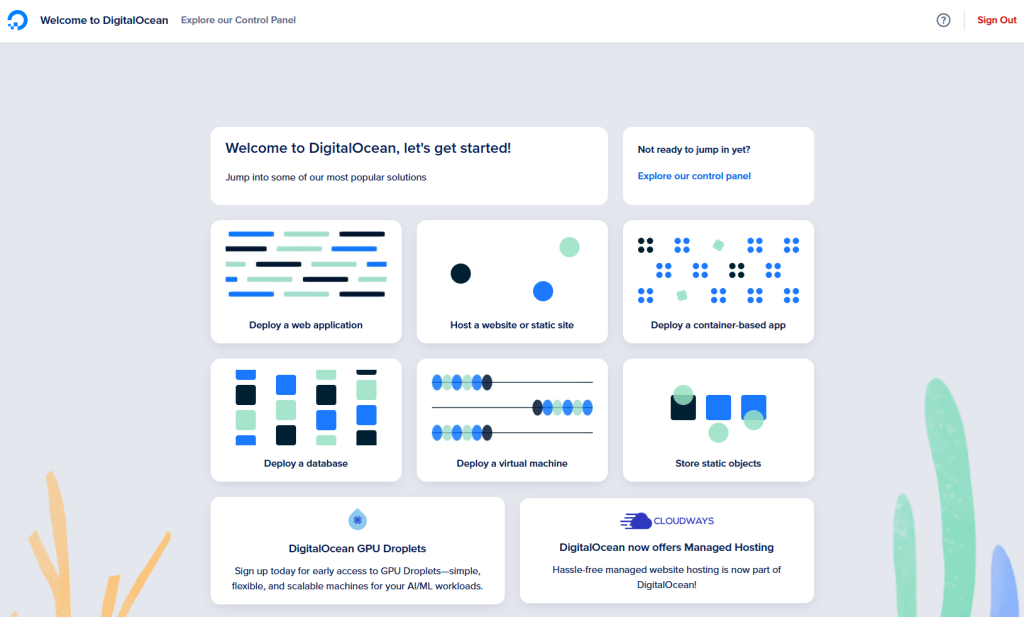
Once you sign up and verify your DigitalOcean account, you’ll be taken to a simple, guided setup screen.
Since we’re building a website, select “Host a website or static site.”
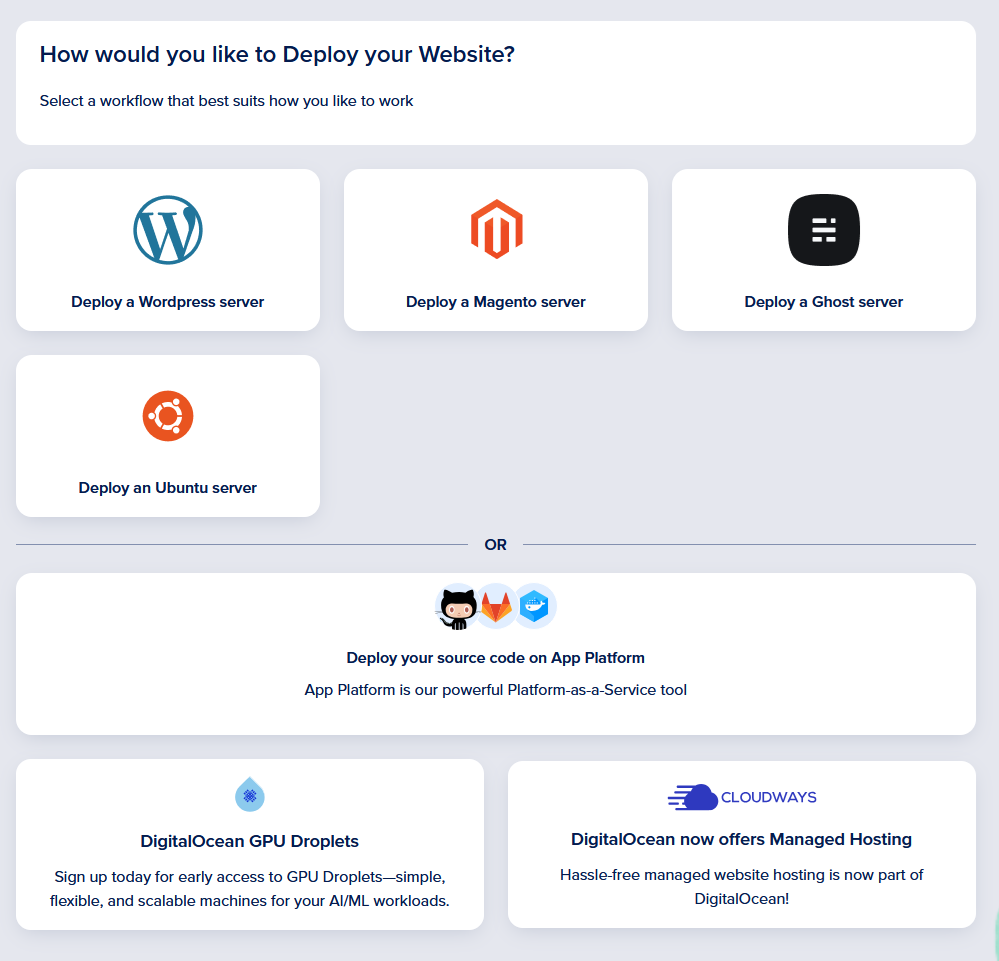
Next, you’ll choose the type of server to power your site. For this tutorial, we want to get up and running fast with full customization, so choose “Deploy a WordPress server.”
This isn’t the same as WordPress.com (which limits your freedom)—this is a fully customizable, self-hosted WordPress installation. You get all the power and flexibility of a true CMS with zero bloat.
After choosing your WordPress setup, you’ll see a few configuration options. It might look intimidating at first, but take a breath—it’s simpler than it looks.
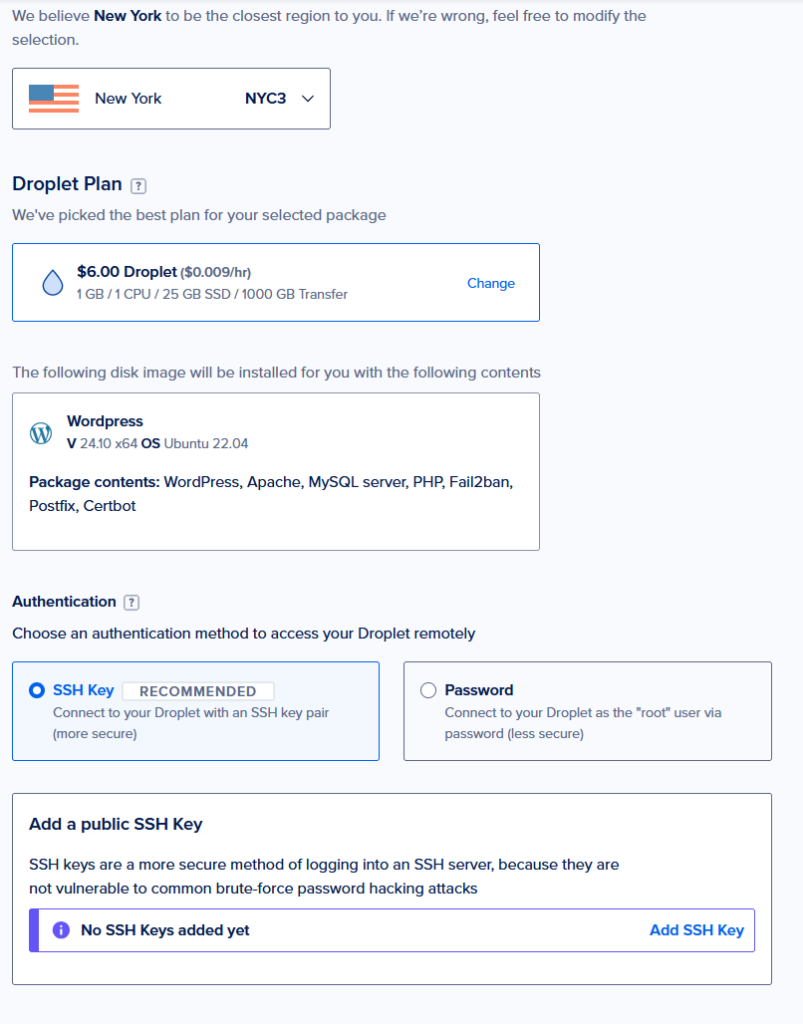
Set up SSH For Your Web server
You’ll be asked to choose between two login methods:
- Password Authentication
- SSH Key Authentication
What’s the difference?
- SSH keys are far more secure. They use a public-private key system where your computer and the server recognize each other without needing to type in a password every time. Security meets convenience.
- Passwords are familiar, but less secure. If someone gets your password, they get full server access.
To use SSH keys
- Open Windows Powershell
- Type:
ssh-keygen - When prompted to save the key file, just hit Enter to accept the default path.
- You can skip the passphrase (just hit Enter again) unless you want extra protection.
- Type:
cat ~/.ssh/id_rsa.pubto reveal your public key.
Copy the full output and paste it under SSH key content:
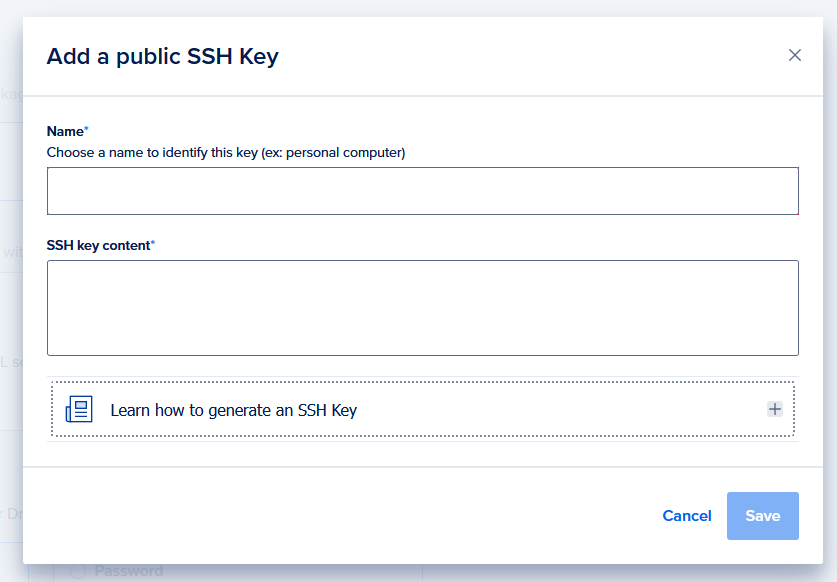
Once your SSH key is added:
- Set a name for your droplet if you want
- Click Create, or Add payment method and Create
Don’t worry: you won’t be charged unless you exceed the $200 free trial. DigitalOcean just requires a card on file to verify accounts.
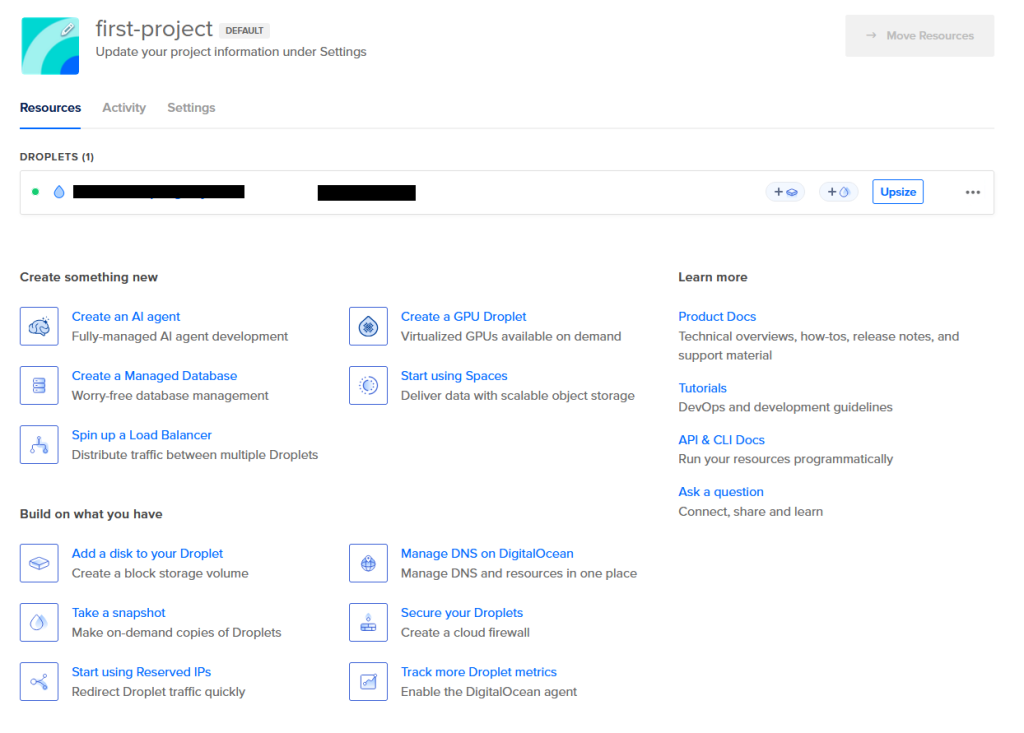
With your server built and completed you will see something like this:
Point Your Domain To Your Server And Set Up WordPress
Setting Your Domain to Your Server
Now that your server is ready, it’s time to point your domain name to it so visitors can actually reach your site. The steps vary slightly between domain registrars, but for this tutorial, we’ll walk through it using Namecheap.
To navigate Namecheap:
- Account > Domain List
- Choose “Manage” on the domain
- Then “Advanced DNS”
- Next “Add New Record”
You will then need to add two records:
- Type: A
- Host: @
- Value: Your server IP
Then:
- Type: A
- Host: www
- Value: Your server IP
Ensure both of these point to your servers IP address.

Configure WordPress to Use Your Domain Name
Now that DNS is set up, let’s configure your server to recognize and respond to your domain:
- SSH into your droplet via PowerShell or your teminal:
ssh root@your_droplet_ip
2. Open your WordPress config file:
nano /var/www/html/wp-config.php
3. Add these two lines just above /* That’s all, stop editing! */:
define('WP_HOME','https://yourdomain.com');
define('WP_SITEURL','https://yourdomain.com');
4. Press CTRL + X, then Y, then Enter. This will save and exit nano.
Install SSL and Enable HTTPS
Next, let’s secure your site with SSL so visitors see that reassuring lock 🔒 in the address bar. This not only builds trust—it helps your SEO too.
- Update your packages:
apt update && apt upgrade -y
2. Install Certbot (if it’s not already):
apt install certbot python3-certbot-apache -y
3. Run Certbot to install your SSL certificate:
certbot --apache
You’ll be prompted to:
- Enter your email
- Agree to terms
- Confirm your domain name(s)
Certbot will automatically detect your Apache config and set up HTTPS, including redirecting HTTP traffic to HTTPS.
“How To Build Your Own Website” – Completed
And with that, congratulations. You can now visit your WordPress website at https://your-site.com.
You’ll be guided through the WordPress setup wizard. Once that’s complete, you’ll access your admin panel anytime at: https://your-site.com/wp-admin.
You now officially own and operate a live website with a custom domain and secure connection. Welcome to the world of self-hosted web development—you’re no longer just a visitor on the web… you’re a creator.
Leave a Reply